Tuesday, November 15, 2016

inject Windows 10 Cumulative via DISM in ConfigMgr

Previously I talked of an issue around Windows 10 1607 and WSUS patching for B&C Task Sequences. We use MDT to create images that are in turn deployed via SCCM. This issue reminded me of some past items in Windows 7 around updates that need to be pre-injected before sysprep runs, aka first bootup. Some off the top of my head:
  • NVMe (2990941)
  • TPM 2.0 (KB2920188)
  • Servicing Stack (KB3020369)
This got me to rethink on what is our best approach for patching Windows 10 systems during deployments. Does it make sense that we do first bootup as patched as we can during B&C or deployment? You have to decide if it does for your environment. For mine it looks to be the case to do during deployment, least until MS brings Unified Update Platform (UUP) to life and it works its way into SCCM.

With Windows 10, a big big way to handle early boot issues is to apply the latest Cumulative. This can mean the B&C WIM only gets changed for other items besides patches so I think I can get to one or two B&C WIM cycles in between major releases such as the upcoming Creators Update. Traditionally with Windows 7 we push a new one once a quarter and the Apply Patches steps get them current otherwise. By injecting the latest cumulative, the Apply Drivers step has less to process when it generates the JET database used by Windows Update and determines what patches apply. This also has the benefit of working with any out of band cumulatives released. You run whatever cumulative you want or for me the minimum needed for WSUS to work in the B&C process.

Downside would be size, as of today the 64-Bit latest cumulative (KB3200790) is 892MB so that is extra storage on a DP that will grow as new cumulatives are released. I have not validated but the update should match what is pulled via SUP so storage and replication may be minor. Since I use Nomad this does not apply to me as it does not have any centralized store like a SCCM DP does.

So going off my previous issue, we inject the minimum patches needed into the B&C WIM and run the latest Cumulative during deployment from ConfigMgr. Here is how to set it up for 1607:

  1. Locate the latest cumulative. MS has a great page to track that. 
  2. Once identified goto the Update Catalog to get the MSU.
  3. Put the downloaded MSU on your SCCM Source in its own folder
  4. In the SCCM Console create a package for it
    1. I call it 'OSD - Windows 10 1607 Cumulative KBXXXXX'
    2. For the Description I use '2016 11 09 Cumulative for Windows 10 1607'
    3. Point the package source to the UNC in step 3
    4. Do not create a program
    5. Optionally for Nomad I use 100% work rate
    6. Finish out the wizard
  5. In the SCCM Console goto your 1607 Task Sequence
    1. Find the Apply Image step, noting 32-Bit or 64-Bit
    2. Immediately after create a Run Command Line step
    3. Point it to your package path
    4. For the command line use 
 Dism /Image:%OSDISK%\ /Add-Package /Packagepath:"." /ScratchDir:"%OSDISK%\Windows\Temp"   

This assumes you only did the 64-Bit in the package. If you put both 32-Bit and 64-Bit MSU files in one package you will have to modify the Command line step as needed. This step above will apply any files it finds in that path.

The DISM injection goes WAY quicker then the Apply Patches step and the deployment itself goes faster as well this method.


Friday, October 28, 2016

Windows 10 Cumulatives and ConfigMgr SUP Supersedence


With version 1607 of Windows 10 MS is pretty responsive and aggressively releasing cumulative updates outside of Patch Tuesday. Since its release on August 2nd they have had 9 Cumulatives. For September 2016 there were 3. August 2016 had 4. October has 2 so far. Either hate them or love them (I love them) it can throw off your patching cycles in ConfigMgr depending on how you have SUP configured.

You have a setting for SUP in relation to how it handles patch supercedence. In the console this is under Administration | Site Configuration |  Sites. Then right click your primary site and choose Configure Site Components | Software Update Point. On the 'Supersedence Rules' tab you have a couple options for how ConfigMgr works with supercedence.


Either expire immediately or wait a set number of months, extremely simple. Expiring immediately is great so it keeps your Software Update Groups and packages cleaner so endpoints have less to process. This doesn't work well for Cumulatives depending on your patch cycle.

Using September 2016 with a pretty commonly used monthly patch cycle as an example. 

  • 09.13 - Cumulative released (Patch Tuesday)
  • 09.15 - Patches sent to patch testing end points
  • 09.20 - New Cumulative released and previous expired
  • 09.20 - Patches sent to all endpoints
  • 09.29 - New Cumulative released and previous expired

With the first option, the cumulative patch released on 09.13 is removed on the 20th. Now you are NOT patching 1607 systems (cumulatives at least) as of that date until you approve the newer cumulative. You thought you were patching 1607 systems when you push to the fleet on the 20th but you are not, its gone due to this setting. 

To resolve, change this to the second option which delays the expiring process by those months. Using a monthly cycle, 2 or 3 months is probably the best option. Use longer then your patch cycle. I am choosing 3 months as i dont know how they are defining a month. The first of the next month? or 30 days later? etc.

Additionally, now you have a new cumulative to send to your patch testing end points since you have to start over with a new cumulative. This can cause some issue if you didn't plan on it as this setting is for any patch expiring. So other patches will remain around for this period if they become superceded. This also makes you rethink your patch cycle strategy. Do you stay on a monthly (or whatever) cadence or follow in Microsofts Aggressiveness? One option is to create a specific Software Update Group with the latest Cumulative and just make it optional vs mandatory. Lots of options here based on your environment.  I wrote a little about Patch Testing here and how to automanage the members.

Additionally, Microsoft posts their Windows 10 Update History here. Great KB to keep up on.


Thursday, September 29, 2016

Windows 10 In-place Notes

So I have started experimenting with in place upgrades in ConfigMgr. The stock Task Sequences dont have any error catching in them so I am starting down that road. My first attempt was the use something Johan Arwidmark posted. Do a scan, then upgrade if the scan came back clean. Great idea. Addresses many catches. 

So setting that up I do my first run. Using a VM with a few apps on it. Should run fine. Watched it until it started downloading the Install Media and coming back from lunch I have a systray bug saying Software was installed and to click here. Something was not right so I clicked it.


Something didnt feel right. Sure, Microsoft backpeddled a little on the Start Menu between Windows 7 and 10 but I would expect it to look different then the same... Sarcasm aside, it did give me a chuckle when I saw this. Now to resolve.

So first off to smsts.log under %WINDIR%\CCM\Logs. It shows it exited cleanly. Johans post has a continue on error for the scan step I'm not a super big fan of this option but it is useful. Digging firther we find an error on the scan step.


Process completed with exit code 3247440392
Saving exit code 0xC1900208 of Windows upgrade to Task sequence environment variable '_SMSTSOSUpgradeActionReturnCode'

Decoder ring time... This has key

  • Compatibility issues found (hard block):  0xC1900208
ok. makes sense. I have not put in any error control for non successful exits from the scan. Still have to find the cause of this particular issue. Head on over to setupact.log under %WINDIR%\Panther. Not here, this is from the initial deployment. Searching.. Theres one in %WINDIR%. 


Determining whether we should run ConX or legacy setup

Will launch ConX setup experience
Launching ConX setup experience
Inspecting ConX Setup Cmdline
Launching C:\_SMSTaskSequence\Packages\CH200AC0\Sources\SetupPrep.exe /ImageIndex 1 /auto Upgrade /quiet /noreboot /postoobe "C:\WINDOWS\SMSTSPostUpgrade\SetupComplete.cmd" /postrollback "C:\WINDOWS\SMSTSPostUpgrade\SetupRollback.cmd" /DynamicUpdate Disable /compat ScanOnly

Not useful, shows us starting the scan but no scan results. %WINDIR%\SMSTSPostUpgrade has some interesting BAT files. Still searching for relevant setupact/err logs. I am guessing that ConfigMgr cleaned those up when it wacked the %SYSTEMDRIVE%\_SMSTaskSequence folder. 


Lets run the scan again manually to see where things go. Grab the execution from SMSTS.LOG (above). I did strip the two post switches.

SETUP.EXE /ImageIndex 1 /auto Upgrade /quiet /noreboot  /DynamicUpdate Disable /compat ScanOnly

Setup created the directory %SYSTEMDRIVE%\$WINDOWS.~BT\Sources\Panther where the two setup logs are located. It was not present earlier. Looking in SETUPACT.LOG it did not have anything useful, just the 0xC1900208 error. Same for SETUPERR.LOG.

Looking around this dir there are some CompatData*.XML files. All but one have this in it

BlockingType="None"

The last log file however, had what we were looking for:

OSMajorVersion="6" OSMinorVersion="1"/>
<Devices>
<Device Class="display" ClassGuid="{4d36e968-e325-11ce-bfc1-08002be10318}" DeviceInstanceId="pci/ven_15ad&amp;dev_0405&amp;subsys_040515ad&amp;rev_00/3&amp;2acf1e9&amp;0&amp;78" Manufacturer="VMware, Inc." Model="VMware SVGA 3D">
<CompatibilityInfo BlockingType="Hard" StatusDetail="WarnUpgrade" Message="You'll have problems with your display in Windows 10."/>
<Action Name="Dismiss" Link="wsc:wica:_pci/ven_15ad&amp;dev_0405&amp;subsys_040515ad&amp;rev_00/3&amp;2acf1e9&amp;0&amp;78" DisplayStyle="Link" ResolveState="NotRun"/>
</Device>
</Devices>
<DriverPackages>
<DriverPackage Inf="oem0.inf" BlockMigration="True" HasSignedBinaries="False"/>
<DriverPackage Inf="oem1.inf" BlockMigration="True" HasSignedBinaries="False"/>
<DriverPackage Inf="oem10.inf" BlockMigration="True" HasSignedBinaries="True"/>
<DriverPackage Inf="c:\windows\system32\driverstore\filerepository\vmci.inf_amd64_neutral_faff95b55e0fdc1f\vmci.inf" BlockMigration="False" HasSignedBinaries="True"/>
<DriverPackage Inf="oem5.inf" BlockMigration="False" HasSignedBinaries="True"/>
<DriverPackage Inf="oem8.inf" BlockMigration="False" HasSignedBinaries="True"/>
</DriverPackages><Programs/></CompatReport>

Again, I knew I had to put in some error control and probably some HTAs for end user prompts. This error though, the SVGA driver is incompatible. Hmm.. Using the latest tools 10.0.10 in the VM. Surprised to see this. Lets run setup.exe by itself to see how the GUI takes an upgrade. Do have snapshots afterall. Same error, so if I'm in a hurry, just run the GUI to see if it complains as well.


The GUI let me continue so lets revisit our Task Sequence and enable 'Ignore any dismisible compatibility messages' on the Upgrade Operating System step for the Assessment.  It works now as the ScanOnly is returning 0xC1900210 (3247440400).

-Kevin


Tuesday, September 13, 2016

MDT Windows 10 1607 and WSUS

While we use ConfigMgr for deployments we do use MDT for Build and Capture. Just works better for some reason. Many others recommend it as well. So right down that path for 1607 I went. Something wasn't right though. It would not download updates from the MDT WSUS instance...

The first patch to download is 'Microsoft Silverlight (KB3162593) so I was thinking originally it was an issue with Silverlight so I remove that. It just stops on the next one. Then I thought WSUS so I make sure its all current and KB3159706 is still latest so I'm good there. Since doing our last few B&Cs I did dedup the drive WSUS content is on so I remove that. Still no love. Now I am circling back to 1607 itself since there were no other changes made for MDT.

So on the B&C box I'm looking at WUA logs. Not really seeing anything in there other then update GUIDs and it trying to set auto detect proxy. Hmm. Why is it trying to get out when I have WSUS in the customsettings. Digging around the web I find that Johan Arwidmark mentions that KB3176495 needs to be injected for this issue. makes sense. We do that for some of the rollups to save some WSUS time and of installing some low level patches for NVMe and TPM 2.0 support in Windows 7.

Johan's suggestion doesn't work for me. Same result, stuck at downloading the first update. During August, MS released several cumulatives for 1607 since the Aug 9th one Johan mentions so I try those as well. Maybe its in one of those?


  • KB3176934 (8.23.2016)
  • KB3176938 (8.31.2016)

Nope. Also just because I tried the earlier ones from July which also failed. Also messed with Delivery Optimization that Michael Niehaus was discussing.

Finally I stumble on this post, KB3176936, called 'Servicing stack update for Windows 10 Version 1607: August 23, 2016' It works. The name says it all: "Servicing stack update". I get a patched 1607 system now! So I go back through my above trials with each cumulative. It works with the 8/9/2016 and higher through the 8.31.2016 release. but fails with the 8.2 and July ones.

I add the two into Patches to get injected. Since I use MDT for Windows 7, 8, and now 10, I have sub folders for each OS and arch as well as specific Selection Profiles. Therefore under the Task Sequence under the 'Apply Patches' step it points to the Windows 10 64-Bit folder containing these two KBs.

As the Sept Patch Tuesday is fast approaching, I would assume we will see another Cumulative that may include this Servicing stack update as well. If not then I bet the next one will.

UPDATE: 09.13.2016 - Yes, the Sept Cumulative KB3189866 (14393.187.1.2).has this fix build in as I suspected.

-Kevin


Monday, September 12, 2016

Updated AD Cleanup Script supporting ConfigMgr


Previously I wrote about how we manage to keep Active Directory clean, which in turn helps keep ConfigMgr clean by deprecating old machine objects. Instead of rehashing, you can just read the original post to understand its full purpose.

A major change in this new version is that it adds support for SCCM. If you do not use SCCM then do not move to this one as there is no SCCM=True switch to enable/disable that functionality.

By pulling from ConfigMgr the emails are more useful.

 Disabled computer account ABC12345. Last SCCM Inventory:9/5/2016 9:35 PM. Primary User:kfason. Account was moved on 8/8/2016 1:44:43 PM. Description: ::Account Automatically Moved - [8/8/2016 1:44:43 PM]  
      ABC12345 was moved to ou=Disabled,ou=ADCleanup,DC=mydomain,DC=local.  
      Updated the description for account ABC12345.  

The flow was changed to be more streamlined as well with this order:
  • Delete machine objects that are at that date
  • Disable any Active machine objects (that were already moved) that are past its date
  • Move any machine objects into ADCleanup that have not touched the domain since its date
  • Move any machine objects (out of ADCleanup) that have touched the domain back to where the script found them
  • Move any enabled machine objects out of the Disabled OU back to where it found them 
Additionally if there are any formatting errors it will put those in the email so you can deal with them manually if it could not figure it out. Can be useful if you have staff making changes to these objects. Im sure these could be adapted to the older version if you wanted to try.


 Disabled computer account ABC12345 does not have correct disabled time stamp.  
 Cleaned up description field for CBA54321.  

Download


The time frames and paths can be modified so review lines 1 through 34 and 740. Line 19 lets you choose specific OS versions to work with to include Servers for example. There are two optional support files available. One for Excluded Computers and one for Excluded OU's. They are used to exclude objects manually created for non Windows devices such as SAN or Linux systems as well as special purpose OUs that need excluding.

This script is provided as-is, no warranty is provided or implied.The author is NOT responsible for any damages or data loss that may occur through the use of this script.  Always test, test, test before rolling anything into a production environment.


You can get the updated script here.


-Kevin

Friday, August 19, 2016

ConfigMgr and Office365 Click-to-Run 2016


A little while back I wrote about ConfigMgr and managing Office Click-to-Run 2013 and recently I was asked about how I am dealing with Office Click-to-Run 2016 and ConfigMgr. As you could guess I updated my handy shell script to deal with it. I'm glad that Microsoft released Office365 Update support in the 1606 update for ConfigMgr Current Branch that manages Office 365 ProPlus Updates directly within ConfigMgr so I never spent much time other then adapting the older shell script to 2016 and all the channels.

Still  wish MS would only download if the version is changed to whats local.

Function

This will download all four channels in both 32-Bit and 64-Bit. Each channel for both arches is about 2.75GB in size. After downloading, the script will generate an email and very simply tell you the versions for each channel. Formally I had attached the ODT log but since it was never referenced its since been removed. For 2016 it looks like this:

Office365ProPlus 2016 Click-to-Run Download Complete. See you next time!


Deferred Channel
16.0.6741.2048
16.0.6741.2056

First Release for Deferred Channel
16.0.6965.2058
16.0.6965.2063
16.0.6965.2066
16.0.6965.2069

Current Channel
16.0.6965.2063
16.0.7070.2022
16.0.7070.2026
16.0.7070.2028

First Release for Current Channel
16.0.7070.2022
16.0.7070.2026
16.0.7070.2028
16.0.7070.2030

Additionally I also updated the 2013 ODT script to email the same information and included it in the ZIP at the end. Its output is a great deal simpler since there are no channels.

Office365ProPlus 2013 Click-to-Run Download Complete. See you next time!

Office365 2013 Versions at \\server\path\to\\OfficeClick2Run\Office2013

15.0.4797.1003
15.0.4805.1003
15.0.4815.1001
15.0.4815.1002
15.0.4823.1002
15.0.4823.1004
15.0.4833.1001
15.0.4841.1001
15.0.4841.1002

Until 1606 is in play in my environment,  this script will keep puttering away running every couple days sucking down the office bits. For the ConfigMgr side, this is not very different then the 2013 I wrote about previously. The only difference is a few more baselines to handle each channel that reference a specific UNC path for it. The Deferred channel is default unless you have one of the other 3 channels controlled by a baseline. Those baselines reference an AD group with machines as members. Same for 64-Bit if needed.

XML

For the XML, The Office developers maintains a GitHub site that lets you generate an XML using a GUI editor. This is extremely handy so your not digging through the TechNet article about its syntax. Their main GitHub site has some other interesting items as well.

Download

This script is provided as-is, no warranty is provided or implied.The author is NOT responsible for any damages or data loss that may occur through the use of this script.  Always test, test, test before rolling anything into a production environment.

You can find the download script referenced in this post here. You will need to tweak them for your environment. Additionally, you will need to download the latest ODT from Microsoft and blat.exe for email.

Tuesday, June 28, 2016

Detect Administrator Privileges Within Batch File


I am almost done removing local admin privileges from all our users. This brought up some issues around batch files. Being a member of local admin this stuff will run with an elevation token. While we are migrating to Powershell, we have many batch files doing lots of things that require admin privileges and quite simply batch files can do many tasks simpler then a PS1.

This sample below has separate outcomes if they double click it vs if someone forces elevation by right clicking the BAT or CMD file and selecting 'Run as Administrator'.

Do whatever you want at the top. I use this for documentation and versioning. You can see many of my other blog posts with bits here. you could do this at the top right after '@ECHO OFF' even.

Then we detect if we are running with an elevation token via an IF then loop:
 NET SESSION >nul 2>&1  
 IF %ERRORLEVEL% EQU 0 (  
   GOTO DOSTUFFASADMIN  
   ) else (  
   GOTO NOADMINDETECTED  
   )  

If we are not then it will jump to the FAIL label and tells them to right click it then exits out with error level 1 (error). This can be fed into other workflow scripts etc.

 :NOADMINDETECTED  
 ECHO.  
 ECHO ####### WARNING: ADMINISTRATOR PRIVILEGES REQUIRED #########  
 ECHO This script must be run as administrator to work properly!  
 ECHO If you're seeing this then right click on the shortcut  
 ECHO and select "Run As Administrator".  
 ECHO ##########################################################  
 ECHO.  
 PAUSE  
 EXIT /B 1  

If successful then it jumps to the DOSTUFFASADMIN label to do the meat of the script. While this label is first in the loop I put it AFTER the failure as the main part of the script can be long so lets fail early if needed.

 :DOSTUFFASADMIN<br />  
 mycoolstuff.exe &nbsp;/dothis /dothat  

Obviously change the labels as you see fit.

So what is happening here? the command 'NET SESSION' shows remote sessions and needs to be ran as an admin in order to show output. When executed via an administrator command prompt it exits with ERRORLEVEL 0 so goto the DOSTUFFASADMIN label.


 Microsoft Windows [Version 10.0.10586]  
 (c) 2015 Microsoft Corporation. All rights reserved.  
   
 C:\WINDOWS\system32>net session  
 There are no entries in the list.  
   
 C:\WINDOWS\system32>echo %ERRORLEVEL%  
 0  

Yet if ran with a standard user token it errors out with ERRORLEVEL 2 so it jumps to the NOADMINDETECTED label. We are only looking for a zero as success so anything else will cause a failure.

 Microsoft Windows [Version 10.0.10586]  
 (c) 2015 Microsoft Corporation. All rights reserved.  
   
 C:\Users\Kevin>net session  
 System error 5 has occurred.  
   
 Access is denied.  
   
 C:\Users\Kevin>echo %ERRORLEVEL%  
 2  
   
 C:\Users\Kevin>  

-Kevin

Monday, May 16, 2016

VMWare Tools and Drivers in Task Sequence

Overview


I have many virtual systems in my environment. Most running the VMWare Hypervisor in ESXi, Workstation, Horizon View etc. I've mandated as my firm's EUC (End User Computing) Architect that it all sources back to OSD in ConfigMgr. To make this easier I packaged up the VMWare Tools as well as handle drivers (VMXNET3 anyone?).

Life is easier now as VMWare has de-coupled the Tools from Workstation or ESXi and can be downloaded directly. They have released several already since doing so and are on 10.0.8 as of this writing.


Application

After grabbing the ISO from VMWare, extract it and upgrade/install a VM with it. Once that is done setup an application within ConfigMgr however your policy is. For me we use supercedence so older ones are present as well.

With two deployment types. One for 32-Bit and one for 64-Bit.
64-Bit
 setup64.exe /s /v/qn ADDLOCAL=ALL REBOOT=ReallySuppress  
32-Bit
 setup.exe /s /v/qn ADDLOCAL=ALL REBOOT=ReallySuppress   
For the detection method just use the MSI GUID.  You can find this via many methods such as in the VM via the registry at HKLM\SOFTWARE\Microsoft\Windows\CurrentVersion\Uninstall. This also is what becomes the Uninstall program. For 10.0.8 it is
 {F4B2C3ED-A9F2-4B8B-92C8-2688CCF15D02}  
which would make the uninstall program for both 32-Bit and 64-Bit
 MsiExec.exe /x {F4B2C3ED-A9F2-4B8B-92C8-2688CCF15D02} /qn /norestart  
On the requirements tab you can use something like a custom  'Computer Model' = VMWare Virtual Platform' and built-in Operating System equals whats applicable such as 'All Windows 7 (64-Bit)'.


You can advertise this to all systems in your fleet as available or required as well as use in an OSD Task Sequence. Whatever you want.


I wish there was a way within the VM to determine which platform its one. Workstation, View, ESXi. This would make targeting apps to a collection easier. It may make sense to update Workstation with the latest, but keep the ESXi ones on what's provided with it for example.


Drivers

So how do we get the drivers into SCCM? Real easy actually. Go to your VM and look in 
%PROGRAMFILES%\Common Files\VMware\Drivers. Take the contents of this folder and put them into a driver package, or however, you do drivers. Then add as a step to an OSD. Like any other driver package, do a WMI query for the model (VMWare Virtual Platform) or manufacturer (VMWare, Inc.). I talked about how I handle drivers here.

For the driver package note that the contents of this folder are different for W7 (Server 2008 R2) and down vs Windows 8 (Server 2012) and up. One driver, the mouse driver is different. I have two packages as I have not fully vetted a merged one. PNPID and version should handle it in one package but I have not tested in all instances yet. With DP's deduping it's not a big deal actually.


Bonus

I will try to keep track of the GUIDs for all the versions and post them here as they come out. If you have older ones please pass them on and I will include them. Note I am only doing the 64-Bit ones below after about 10.2.0 when they split.

 12.3.0 -  {AF174E64-22CF-4386-A9EC-73F285739998}
 12.2.0 -  {A14655C8-5589-4CF6-BCDE-DFFB9A9BF17C}
 12.1.5 -  {65A35679-0C08-4C9A-9AC3-46417F198653}
 12.1.0 -  {A3631D35-CFA5-45F6-A65E-DAFA81C4CBE6}
 12.0.6 -  {CB7FFC88-0CB2-48DD-9D7A-089D216607F8}
 12.0.5 -  {B6018ED0-EF9F-4432-A755-9029562DD15E}
 12.0.0 -  {AC968A64-CCC0-4916-A426-BA05F38AC28B}
 11.3.5 -  {1FF5D624-5515-4343-837A-E54C101573E6}
 11.3.0 -  {4FE02FF2-2194-4E1D-8B04-F934655966F9}
 11.2.6 -  {E6E6404B-1F59-4EAB-A1B9-EA1A33B71159}
 11.2.0 -  {61ABD5FF-2D98-4C4A-9E36-187C882317CB}
 11.1.0 -  {4FE2D79D-BB1C-4F45-BDBC-192D37C3AE40}
 11.0.6 -  {D533345C-7F8D-4807-AE80-E06CE2045B0E}
 11.0.5 -  {25932044-BBC8-444F-ACF4-7E508054FA12}
 11.0.1 -  {742FCBAF-EE5D-48B2-9E95-DA0513B79570}
 11.0.0 -  {7B09CBED-1199-4BA3-9948-A28DB7C9C396}
 10.3.10 - {01767101-A688-4A95-9C83-6DED9EB6735D}
 10.3.5 -  {F32C4E7B-2BF8-4788-8408-824C6896E1BB}
 10.3.0 -  {1D92E489-0CFA-4F37-AC54-BD5EB372A2D4}
 10.2.5 -  {6D158FDD-2E20-4C54-A271-4D2CE2C39905}
 10.2.1 -  {092CAFE8-7A43-4C32-82C6-A5547F93417F}
 10.2.0 -  {766355C9-1851-4890-9C1F-9F043A43AFCE}
 10.1.15 - {7CFC363A-72CE-409C-97C2-E497A1D831FC}
 10.1.10 - {EEAD1455-1743-4746-8AEA-C1956133B736}
 10.1.7 -  {45147181-CF69-4C8C-81CB-0FC96F170758}
 10.1.5 -  {30B36D27-24D7-4C18-996D-9A23B9235707}
 10.1.0 -  {507F5BFC-6DFE-43CF-A552-DABE868FCDFE}
 10.0.12 - {FC5F4DCF-B54A-435E-8B0D-737BB373ED69} (XP/Server 2003 Only)
 10.0.9 -  {7595A850-FE4D-4273-84FA-9CC1068AFF7A}
 10.0.8 -  {F4B2C3ED-A9F2-4B8B-92C8-2688CCF15D02} 
 10.0.6 -  {ECD203D2-312B-4EC7-9D55-778A81C6BDE9}
 10.0.5 -  {0C69DF99-B17A-4490-910B-64811AEA2F48}  


-Kevin

Virtual Systems Collection

I have many collections around different system types as I am sure you do. Specifcally for platforms I have many such as:
  • All Workstations
  • All Servers
  • All Systems
  • All Desktops
  • All Mobile Devices
This simple query will identify the virtual systems. By using the relevant above collection as the limiting collection you can see whats virtual.
  • All Workstations
  • All Workstations - Virtual
  • All Servers
  • All Servers - Virtual
  • All Systems
  • All Systems - Virutal
  • All Desktops
  • All Desktops - Virtual
  • All Mobile Devices
  • All Mobile Devices - Virtual
Even change the query to a not equal (!= or use 'False') in order to collect all physical systems on their own.

 select SMS_R_SYSTEM.ResourceID,SMS_R_SYSTEM.ResourceType,SMS_R_SYSTEM.Name,SMS_R_SYSTEM.SMSUniqueIdentifier,SMS_R_SYSTEM.ResourceDomainORWorkgroup,SMS_R_SYSTEM.Client from SMS_R_System where SMS_R_System.IsVirtualMachine = "True"  


Sunday, March 20, 2016

Deploying Windows 7 to systems with NVMe drives


I just got in a shiny Dell Precision 7510 loaded to the gills for one of our mobile graphics design standards to replace the Dell Precision M4800. It has Thunderbolt, NVMe, etc. Since we are still using Windows 7 for design it needs to work with that OS. Luckily Microsoft has released an update to support NVMe. Two KBs are needed.


The KB articles talk about injecting into your source install.wim from the original SP1 DVD however I chose to go a different route and do this via our Deployment Task Sequence.

Three reasons for this decision. One is that it is done via a hotfix, not an (more vetted) update so I want to only apply it to the affected systems. This thew out it being done via our Build and Capture TS. Second is there is a hotfix to the hotfix. The second hotfix (3087873) fixes a BSOD problem after applying the NVMe hotfix. The third being that as of this writing, we are using version 3 and version 2 of the hotfixes respectively. Therefore I did not want to inject it for all systems.

In my TS, the OS arch is chosen via an HTA so immediately after the Apply OS step we run both hotfixes.


This is done via simple DISM commands calling a package containing both files:

 DISM /Image:%OSDISK%\ /Add-Package /PackagePath:".\Windows6.1-KB2990941-v3-x64.msu"  
 DISM /Image:%OSDISK%\ /Add-Package /PackagePath:".\Windows6.1-KB3087873-v2-x64.msu"  

While I did it as two steps, you can run it as one by stacking the PackagePath switches:

 DISM /Image:%OSDISK%\ /Add-Package /PackagePath:".\Windows6.1-KB2990941-v3-x64.msu" /PackagePath:".\Windows6.1-KB3087873-v2-x64.msu"  

Couple things to note.

The hotfixes are only for 64-Bit Windows 7 and Server 2008 R2. This is due to it needing UEFI. I will say that I got it to work with BIOS and drives formatted via the MBR but your hardware may not work this way. my eval units are BIOS, however for production they will be UEFI.

You cannot update the firmware of an NVMe drive in Windows 7. Per the first hotfix, the subnsystem is not in Windows until 8.1.


Sunday, February 28, 2016

Replace Edge with Internet Explorer on Windows 10 Taskbar via Task Sequence


UPDATE: 02.15.2017 - I have updated this process around version 1607 which you can find here.


Now that I am very close to making Windows 10 available to the masses I have begun the polishing phase. Edge is not ready for us yet so until that point, I need to change the defaults from Edge to Internet Explorer. However we want Edge to be available for anyone who wants it so LTSB was out. I dont want to remove it, just make IE front and center until Edge is ready. I am looking to change this

to this


which should be easy right? Not so in Windows 10. It was a brutal process to get going. In previous Operating Systems its a no big deal and even in W10 its easy to do to AFTER the first login if you transition from the default user to touching existing user profiles. The key being initial login. Whatever the process is that is the  "Hi"... "Were glad your here"... stomps over several settings made to default user regardless of you using CopyProfile or making specific changes to the profile during deployment in the Task Sequence.

Attempt One


My first method was to use verbs (overview) for the items I want to remove and pin. It has worked well in Windows 7 and since the taskbar returned in Windows 10 I thought it would work. It does work post initial login for any legacy programs. However Edge, being a modern app does not have verbs.  To give examples of working with Modern Apps, to create a shortcut for Edge you would use this:

%windir%\SystemApps\Microsoft.MicrosoftEdge_8wekyb3d8bbwe\MicrosoftEdge.exe

Or this if you want to goto a specific site:

%windir%\explorer.exe microsoft-edge:http://kevinisms.fason.org

So using verbs failed because I could not unpin Edge or the Store and the "Hi"... process stomps all over it anyway.

Attempt Two


Since that did not work I will just have to go oldschool and set it up on a donor machine and then import via the Task Sequence.

Two areas of focus. One is this registry path:

HKEY_CURRENT_USER\Software\Microsoft\Windows\CurrentVersion\Explorer\Taskband

In this location you have several binary (REG_BINARY) values so its easier to export it from a donor machine and import then to do a 'REG ADD' of each one individually.

The second is this file path:

%APPDATA%\Microsoft\Internet Explorer\Quick Launch\User Pinned\TaskBar

This houses the shortcuts for the items on the Taskbar. Note that these are only used for the icon bitmaps and not the actual launching, that is handled by the 'Favorites' Binary value in the registry location above.

This works if you import it and copy the files, though you do need to log out and back in or restart explorer.exe. For deployment purposes the "Hi"... process stomps over it during first login and sets the Tasbar to the initial screenshot above. Its nice that it will add your slot 3 and on pinnings so the Store icon can be gone. Not so much what I am looking for however.

I also learned that "Hi"... will remove any 'Internet Explorer*.lnk' files it finds under the %APPDATA% User Pinned path. I tried various incarnations such as 'Internet Explorer 11.lnk' however IE11.lnk is not removed. It just means when you right click the Taskbar icon it states IE instead of Internet Explorer. Not everyone knows what IE is so had to work another solution for this part.

In a Task Sequence, you import the reg file and the shortcuts to the paths above modified for the default user which I cover below.

Attempt Three

Attempt two works mechanically, now we just need to work around the "Hi"... headache. So lets use Active Setup. For this we copy the REG file and shortcuts (centered around HKCU) to the default user TEMP via the Task Sequence. We import another reg key for the Active Setup under HKLM. The import ran and HKCU reflects the version called out in Active Setup. This failed as Active Setup is run before or during the "Hi"... process. Changing the version and logging back in it works fine, again post initial login it works fine.

Attempt Four

Now we get to try RunOnce instead of Active Setup. This works! downside is a 2-3 second delay after loading the desktop for RunOnce to call the script. It works so I'll take it for now until I discover a more elequent method of mitigating the "Hi"... process

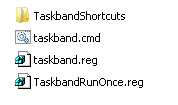
For the package you need a few things from the donor machine. After setting up the taskbar they way you like you need to export this path in the registry to 'Taskband.reg':

HKEY_CURRENT_USER\Software\Microsoft\Windows\CurrentVersion\Explorer\Taskband


You also need to get the shortcut links from here and put them in a folder called 'TaskbandShortcuts'. If you browse to it you'll find that the 'User Pinned' folder is hidden. You do not need to make this hidden in the package as the first login will take care of this.


%APPDATA%\Microsoft\Internet Explorer\Quick Launch\User Pinned\TaskBar

After that you would create the script to populate it by copying the below content into 'Taskband.CMD'. During initial login a DOSBox will pop up running the below for 2-3 seconds. It copies the shortcuts into the users profile at the path above then imports the registry file we created and restarts explorer.exe, otherwise a logout and login is needed. Any language will work, I chose CMD since its simple.

 :: from kevinisms.fason.org  
 :: By Kevin Fason  
 :: This batch file will Modify the Start bar to include some commonly used icons.  
 :: Since Windows 10 overrides during new profile creation this is done post that process  
 :: Created by Kevin Fason  
 ::  
 :: v1.0  02.10.2016  
 ::     Initial Release  
 ::Setup Shop  
 @ECHO OFF  
 TITLE Setting Default Taskbar, Please wait . . .  
 CLS  
 :: Import taskband settings  
 reg import %~dp0taskband.reg  
 :: Copy initial shortcuts  
 DEL /F "%APPDATA%\Microsoft\Internet Explorer\Quick Launch\User Pinned\TaskBar\*.lnk"  
 xcopy %~dp0TaskbandShortcuts\*.* "%APPDATA%\Microsoft\Internet Explorer\Quick Launch\User Pinned\TaskBar" /E /C /I /H /Y  
 :: Restart desktop process to reflect changes  
 taskkill /f /im explorer.exe  
 start explorer.exe  
 :: END  

Last up is the reg file to put in RunOnce to set this all up. Under the default user RunOnce call the CMD. Call it TaskbandRunOnce.reg.

 [HKEY_USERS\DefU\SOFTWARE\Microsoft\Windows\CurrentVersion\RunOnce]  
 "Setup Taskband"="cmd /c %TEMP%\\Taskbar\\taskband.cmd"  

Couple things of note with this RunOnce reg file. One is 'DefU' in the path that I will cover below and the other is the command itself. REG_SZ does not numerate variables so thats why I am calling it with 'cmd /c ...' so that it will enumerate the userse %TEMP% variable. You could instead create this as a REG_EXPAND_SZ and call any variables in the command however it is a binary so it looks funny in REG files as shown here. This example simply calls '%TEMP%\Taskbar\taskband.cmd".

 [HKEY_USERS\DefU\SOFTWARE\Microsoft\Windows\CurrentVersion\RunOnce]   
  "Setup Taskband"=hex(2):25,00,54,00,45,00,4d,00,50,00,25,00,5c,00,54,00,61,00,73,00,6b,\  
  00,62,00,61,00,72,00,5c,00,74,00,61,00,73,00,6b,00,62,00,61,00,6e,00,64,00,\  
  2e,00,63,00,6d,00,64,00,00,00  

Task Sequence


Now that the package is setup we have to get it going in the task sequence. Very simple once you see it.


In my deployment TS I have a group called Registry changes and in it we mount the default users registry along with make any changes to HKLM then unmount it. All the Defualt user stuff is grouped together and ran after the HKLM stuff.


To mount I do what many do by doing Run Command Line step with 

 REG.EXE LOAD HKU\DefU "%OSDISK%\Users\Default\ntuser.dat"

and now anything affecting the default user registry just gets any HKCU reference changed to 'HKU\DefU\'. Once done unmount it via another Command Line step with 

REG.EXE UNLOAD HKU\DefU

So for the 'Set Default taskband RunOnce' reg setting its just a command step to import the TaskBandRunOnce REG file we created earlier with the Taskband package mounted in the step.

Reg.exe import TaskbandRunOnce.reg

Another option would be to do a 'REG ADD...' command vs importing a file and I may switch to that in the future. I did the REG in case I ever change to using a REG_EXPAND_SZ value.

Now that we have the RunOnce primed to run upon first login we need to get the Taskband content into the default user. For that is a simple copy command step called 'Copy Taskband Shortcuts to Default Profile Temp'.

xcopy *.* "%OSDISK%\users\Default\AppData\Local\Temp\Taskbar" /E /C /I /H /Y

All done. To take this polishing a little further I also modified the default browser to be IE and Johan had this process written up so I wont rehash it here.

Additionally I customized the Start Menu itself. Bill Moore did a great job writing that one up as well. I will say that the "Hi"... process removes any references to IE in Start so to get around that I just mount the above package via a step and copy the 'Internet Explorer.lnk' to the default user start menu and on the donor machine I pin that shortcut to the Start Menu.

xcopy "TaskbandShortcuts\Internet Explorer.lnk" "%PROGRAMDATA%\Microsoft\Windows\Start Menu\Programs" /E /C /I /H /Y


-Kevin Fason

Wednesday, February 17, 2016

F8 workaround in Windows 10 ADK post Sysprep


If you are on the Windows 10 ADK (either) you may have noticed that pressing F8 for command support, is not consistent. While in PE it works great, but after sysprep runs and you are in the full OS, the ability to use F8 to bring up a command prompt is spotty. My firm put in a premier ticket and was told it will get fixed at the next ADK release, post 1511. We are not big enough for them to immediately fix nor did they agree it was a needed function of OSD. This of course does no good today and prevents me from looking at smsts.log or doing other diagnosing tasks tracking problems down.

So until then, I came up with a simple workaround using ServiceUI.exe from MDT. While we do not have MDT integrated into our ConfigMgr instance, we do have a package with MDT in it to use the useful scripts from it if needed. SImply put, create a 'Run Command' step with this in it against the MDT package.

 Tools\x64\ServiceUI.exe -process:TSProgressUI.exe %SYSTEMROOT%\System32\cmd.exe /k title Task Sequence Stopped, Close to Continue. . .  

The title switch is optional and since we use 1E Nomad we also have to prestage the MDT Scripts package. Note that unlike using command support (F8) this will pause the Task Sequence until you exit the shell, so keep that in mind. You may need to do one before the bad step and after so you can do any comparisons. Additionally for the problem step you will need to mark it continue on error so this cmd step will run right after and you can do some diagnosing. Once figured out just remove this step and disable the continue on error if needed.

Niall Brady's WindowsNoob posting was my initial thought being to modify his vbs to invoke cmd.exe since natively it just pauses the TS expecting you to F8. The above was a simpler route.

-Kevin Fason

Wednesday, February 3, 2016

VMWare Workstation proc vs core

I had a couple questions about my old Image Mule article and configuring VM procs so thought I’d share with everyone. Basically, unless you have licensing issues just use 1 socket with two core each. This will allow you to have A LOT of machines going with more resources spread out. For example:


While a single proc with two cores appears to present the same thing as shown here,


It actually is NOT presented to the OS the same. Simply put, a Core is ≠ to a processor. Intel, AMD, and even ARM define cores differently. The OS is actually told how many virtual processors (sockets) and cores within those processors. Coreinfo is a great tool to see the underpinnings of how Windows interprets how compute is presented to a VM. Great fun to compare settings. Performance-wise you generally don’t see much difference between processors/cores counts. People smarter than me have done the benchmarks and it comes down to the task at hand mostly, but firmly the licensing of the product you want to run in the VM. This is part of why Microsoft has moved SQL to per core costs and Windows 2016 is going to be that way as well.

While licensing generally applies more on the servers it can apply to what you do on the workstation side. Windows 7 only allows two physical processors (aka sockets) for example. and Windows 10 has the same hardware requirements back to Windows 7. We don’t necessarily have NUMA concerns like ESXI does so much but it can apply if you are doing something intensive. 


I would also suggest you keep the processor cores below what your host system has per VM, and quite frankly, Workstation gets mad if you try more. The host does need some resources, however with that said, VMWare is really good about slicing and dicing. I generally see 4:1 vCPU to physical most of the time.


You can read through this to understand CPU socket vs core from VMWare perspective whereas this is Microsoft's take on it. For Imaging, the captures go great deal faster if you use multiple procs and more memory, like anything else. Capturing a six GB Windows 7 image takes ~40 minutes on a virtual machine with one vCPU, but only ~25 minutes when using two vCPU’s. Additionally Windows 7 has a couple hundred patches these days that may cause you to run out of memory. Settings the VM memory to 4GB solves that problem whereas I use 2GB for other deployment testing.

Also, VMWare workstation has support for BIOS or UEFI so as you mess more with Windows 10 I suggest you start using UEFI so you can learn those features and get your Task Sequences to support UEFI anyhow. Johan has a list of Windows 10 features that require it for example.